Wednesday, June 29, 2011

Tech in the kitchen: Ctrl-Alt-Delete cup set


They're not the keys from a computer keyboard...
See? I told you they're not keys :D
This is not really a tech gadget. But decoration-wise, it’s just too cute to ignore, especially for someone who loves both the kitchen and tech like me. Maybe I’ll drink from the “Delete” cup when I’ve got some problems and I want them to go away. The “Control” cup will be used in situations that get a bit out of control, or when I need more self-control. The “Alt” cup will be for, well, other situations.

This Ctrl-Alt-Delete cup set is sold @ 11.99USD @ ThinkGeek. Now I'm going to add this set to my wish list :).

Donuts

My elder son likes donuts. In fact, he likes almost every kind of cakes and breads and buns. He used to ask me to buy donuts from bakeries for him. But I did not like that idea because those donuts contain too much oil and I’m not even sure what kind of oil is used or if they [those who make the donuts] use the oil again and again just to reduce the cost. In short, those donuts don’t seem to be healthy at all. So my son kept asking and I kept reasoning and refusing.

Now that I’ve got myself a bread maker and discovered its fantastic ability to make dough, I decided to make a batch of donuts for my son. It’s not difficult to make donuts with the help of a BM, the only disturbing thing is that you’ll have to suffer from the heat when deep frying the donuts. In a summer day when temperature goes up high, and in a small kitchen without an air-conditioner, frying donuts becomes a tough task. Anyway, the way my son enjoyed the donuts made me think that it was all worth it :).

Recipe (from here)

Ingredients: (about 25 pieces with diameter of about 6cm)
- 150g bread flour
- 100g cake flour
- 10g milk powder
- 3/4 tsp baking powder
- 30g sugar
- 5g salt
- 1 3/4 tsp instant dry yeast
- 1 egg yolk
- 70ml cold water
- 70ml cold milk
- 25g melted butter

Sugar for coating:
1/2 cup sugar

Method:
1. Put everything in the bread machine according to what your machine's manual said (normally liquid first, then dry ingredients, then yeast last) and start the dough cycle. Once the dough cycle is complete you can start to shape it.
2. On a floured surface and with floured hands divide dough into 23g pieces and shape it into a ball. Pat it flat to about 1.5cm high and make a hole in the middle of the dough. To make the hole in the middle of the dough, I used a small O shape cookie cutter. You can also use a bottle cap. The dough you cut from the holes could be gathered then be made into some more donuts.
3. Prove the shaped dough for 30 minutes on a greased tray covered loosely with glad wrap in a warm environment.
4. Fill the wok with oil about 2.5 inches deep and fry the dough for 30 seconds on each side or till lightly golden brown. Drain well and pat dry with absorbent paper towel before coating them in sugar.
5. Serve warm.

Notes for those without bread machine:

- Mix all ingredients in a big mixing bowl except butter (do not melt butter but use room temperature butter). Mix well to form a dough.
- Add in the butter and knead into a smooth elastic dough. Prove in a covered mixing bowl for 60 minutes. The rest of the process you can follow step (2) from above.
I know, I know, this picture looks weird. I just want to show the texture of the donuts :)
To play it safe, I fried the donuts to the point that they turned a bit brown (not just light golden brown like the ones at the bakeries). They were soft and good when eating right after that, but they became harder (just a little bit, though) the next day, maybe because I fried them too much :-\. I did not coat them with sugar because I didn’t want my son to eat too much sugar, so the donuts were not too sweet.

Monday, June 27, 2011

Braided bread with your favorite filling

As I’ve always admitted, I love baking but making breads and buns frightened me with the long time for the dough to rest and rise. When Jasmine @ Sweetylicious, who is hosting Aspiring Bakers project for June, chose the theme to be BREAD SEDUCTION, at first, I was taken aback. I did not know what to bake to submit (while I’d love to submit at least one bake). After reading a lot of posts @ many blogs, I realized that in most cases, I could make things easier for myself by letting my bread maker do the kneading and first rise. Now I’m so interested in trying many kinds of breads and buns with the help of my lovely bread maker :).

Of the bread/bun recipes I’ve been collecting, there’s a kind of breads that’s so eye-catching: braided breads. A braided bread looks like a princess on its own. It’s also great because you can have various kinds of fillings. Since I’ve got a block of Philadelphia cream cheese and an opened jar of blueberry preserve (of which one third was used to make blueberry madeleines the other day) in my fridge, I went for braided bread with cream cheese and blueberry preserve filling.

This was the first time I made a braided bread, and actually this was among the first few times I made breads, so I had to read the recipe and instructions very carefully. King Arthur Flour has a great recipe and also step-by-step instruction, which was really helpful. Really understanding the recipe did help, because when making this bread, I realized it was not as difficult as I had thought. Yes, it takes time to do that braiding job, but your efforts will pay up. The result should be a beautiful bread, which looks like a work of art.
Well, my bread may not look like an expensive work of art, because this was my first time, remember? :) But I liked it a lot. This is the only photo I have, taken with my phone, because all the bread was quickly consumed, as dessert, as supper and as breakfast :). That's why I couldn't take a better photo with a real camera.
Recipe (adapted from King Arthur Flour)
Sponge:
  • 85g warm water (I used room temperature water because it’s summer here)
  • 1 teaspoon sugar
  • ½  tablespoon instant yeast
  • 29g AP flour
Dough
  • all of the sponge
  • 85g plain yogurt
  • 57g unsalted butter, softened
  • 1 large egg, beaten
  • 50g caster sugar
  • 1 teaspoon salt
  • 1 teaspoon vanilla
  • 302g AP flour
  • egg wash for brushing braid
Cream cheese filling
  • 70g cream cheese, softened
  • 25g caster sugar
  • 28g sour cream
  • 1 teaspoon fresh lemon juice
  • 15g AP flour
  • 57g blueberry preserve
Sponge
Dough
Cream cheese filling
Directions
In a small bowl, combine the sponge ingredients. Stir well to combine, loosely cover with plastic wrap, and set aside to proof for 10 to 15 minutes.
1) Pour ingredients to the pan of your bread maker, in this order: sponge, yogurt, egg, vanilla, sugar, flour, salt. Choose “dough” program. After 5 minutes, add butter to the pan. Let the cycle complete itself.
2) While the dough is rising, prepare the filling (I made the filling early in the morning and put it in the fridge to use later the same day. Take it out of the fridge about 15 minutes before use so it can soften). Combine all the filling ingredients (except the preserve) in a small bowl, mixing until smooth and lump-free (I did this with a wire whisk). Reserve the filling and preserve until ready to fill the braids.
3) When the bread maker completes the task, take the dough out (with lightly greased hands) and gently deflate the dough. Let it rest for about 5 minutes. Roll it out into a 25x38cm (10x15 in) rectangle. Rolling on parchment paper makes moving the bread to the baking sheet much, much easier. Lightly press two lines down the dough lengthwise, to divide it into 3 equal sections. Spread the cream cheese filling down the center section, and top with blueberry preserve, leaving 1" free on all sides of the filling.
4) To form the mock braid, cut 1" crosswise strips down the length of the outside sections, making sure you have the same number of strips down each side. Beginning on the left, lift the top dough strip and gently bring it across the filling diagonally. Repeat on the other side with the top dough strip, so that the two strips crisscross each other. Continue down the entire braid, alternating strips to form the loaf.
6) Set the braided loaf aside, lightly covered, to rise for 30-45 minutes, or until quite puffy.
7) Preheat the oven to 375°F. Brush the loaf with egg wash (one lightly beaten egg, 2 teaspoons water and a pinch of salt), and sprinkle with coarse sparkling sugar, if desired. Bake for 25 to 30 minutes, or until the loaf’s golden brown. Remove from the oven and cool for 15 to 20 minutes before serving.

Thursday, June 23, 2011

Coffee buns - or Mexican buns

I should pipe the topping on the buns more generously next time
Several months ago, I saw a new shop, named “Pappa Roti – the father of all buns”, in the city where I lived. Every time I passed by, I was attracted by the coffee aroma, but there were always a crowd surrounding the small shop, so I didn’t stop. In a cold winter day earlier this year, seeing that there were not so many customers, I decided to try whatever they were selling at that Pappa Roti shop. Turned out they only sold one kind of buns, called “coffee buns”. The buns tasted so lovely that I returned to the shop pretty often to buy those buns not only for myself but for my kids too (just occasionally for my kids because I don't want them to consume too much coffee).

I had never thought of making the coffee buns, because the buns at Pappa Roti shop were good enough already and they weren’t expensive. Until one day, I saw the recipe in a local magazine for kids (yes, for kids!), and it didn’t seem like a heavy task (it was in the kid magazine anyway :)). The recipe was written by my friend so I asked her all kinds of questions. With her encouragement, I seemed to be determined enough to bake a batch of Mexican buns (as my friend called them and I think that’s the right name). The only obstacle was the time required for the dough to rest and rise. So I chose a hot day to make the buns, hoping that the dough would rise quickly. Unfortunately, a hot day in the summer here also means a humid day. So the dough was ridiculously sticky, though I added more than two tablespoons of flour.

Recipe (written by my friend, published in a local magazine for kids)

Ingredients:
A. Filling: 50g salted butter, cut into 8 small cubes. Keep them in the fridge until ready to use.

B: Coffee Topping:
- 1 large egg, beaten
- 40g icing sugar, sifted
- 65g unsalted butter, softened
- 65g AP flour, sifted
- 15ml coffee (about 5g instant coffee and 1 TBSP hot water)
          Method: Beat butter and sugar until pale and fluffy. Add egg and beat until combined. Add flour gradually and beat until well combined. Add coffee and beat well. You’ll get a paste. Spoon it into a pastry bag and refrigerate until ready to use. My friend said you could make the topping ahead and it can be kept in the fridge for 3 days.
          Note: I did this all with a wire whisk, though my friend recommended using a hand mixer.

C: Dough (yields about 8 medium buns)
- 250g bread flour
- 40g caster sugar
- 3g salt
- 5g instant dry yeast
- 30g unsalted butter, softened
- 1 egg, beaten
- 120ml milk
          Method:
1. Combine flour, salt, sugar and yeast in a large bowl. Add butter and combine with your hands.
2. Add egg and milk, knead so everything is well combined. Lightly flour a surface and put your dough on that surface to knead (with light floured hands) until not sticky, smooth and elastic. It took me 30 minutes to knead by hands and resulted in two hurtful arms :(. Put the dough in a large bowl, cover with a damp towel and let it rise for 1-2 hours, until double in size.
Before...
...and after. The dough looked different in colour just because I took the photos in two different places, under two different kinds of light

3. Lightly knead the dough. Divide it into 8 pieces, roll them round like balls. Cover and let them rest for 15 minutes. Flatten each piece, put a salted butter cube in the center, seal and roll them really well again to make sure the butter wouldn’t be leaked during baking. I didn’t seal them well enough so the butter leaked and the buns looked really weird in the oven. Take the topping out of the fridge so it will be softened a little.
4. Preheat oven at 170-180oC. Line a baking tray with parchment paper. Arrange the buns on the tray and spirally pipe the topping on the buns, starting from the center. The topping should cover about half of the bun. Bake for 15-20 minutes until light brown. I baked them at 180C for 22 minutes, turned the tray, then baked for another 5 minutes.
5. Cool on a wire rack. Better serve warm from oven. The buns can be reheated in a preheated oven at 120-150oC for 5 minutes.
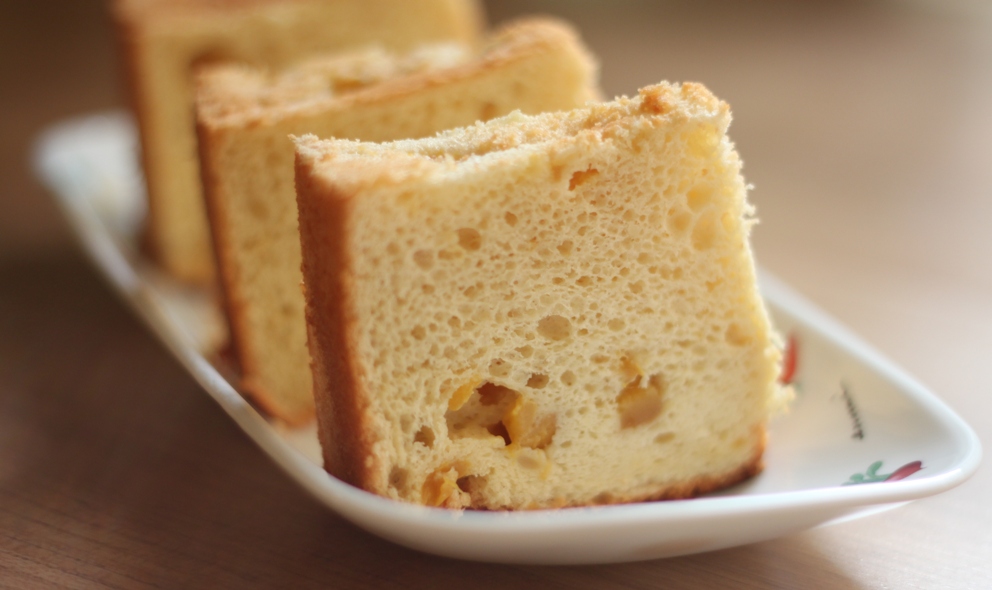
I took this photo next day. The buns were left at room temperature for a day so the topping melted a bit
          My coffee buns were good enough but not as soft as the store-bought buns. Maybe I did not let the dough rise enough :-\. Well, actually I don’t know if there was anything wrong but the buns were eaten up anyway. The problem was that my arms hurt for a couple of days :(. I guess next time I will let the bread maker did the kneading job, stupid me why did I not think of that sooner...

Tuesday, June 14, 2011

Coconut chiffon cake – something soft and sweet

Soft and sweet, isn’t it something you always want to give your loved ones? I guess everyone (except the people who are allergic to coconut) would be so delighted if received this cotton-soft coconut cake, which has a very nice coconut aroma. Believe me, this cake is awesome. Surprisingly awesome, that I know I’d make it again and again right when I tasted it. I should call it “love at the first bite” :).

I ate a piece with red flesh dragon fruit, just because I had a dragon fruit. Else the cake was so delicious on its own.
The texture of the cake was really smooth and moist. It included coconut milk but it did not turn sour at all though I kept it [in a big air-tight box] at room temperature for two days. Again, I’m not sure if it could be kept longer because my cake was eaten up within two days, but to be on the safe side, any pieces of cake left after two days should be kept in the refrigerator. I believe the cake would still be moist and soft that way.
The texture was so smooth and not dry at all. The light was good, thanks to the Sun :)
This recipe is originally from here . Jo @ Jodelibakery was so kind to send me a quick reply about “coconut powder”, so I knew what to use for the cake.

Ingredients: Makes one 8" round tube

A:
- 5 egg yolks
- 50g castor sugar
- 80g cake flour
- 1 tsp baking powder
- Pinch of salt
- 50g coconut powder (ie coconut milk powder)
- 60g vegetable oil (e.g. soy, corn, sunflower) (I used canola oil)
- 70g coconut milk
  
B:
- 5 egg whites
- ¼ tsp cream of tartar
- 50g castor sugar

Method:
1.     Sift flour, baking powder and salt into a mixing bowl. Set aside.
2.     Combine egg yolks and castor sugar in a mixing bowl. Use a hand whisk to mix until light and creamy.
3.     Add all the remaining ingredients in A, sifted flour mixture, coco nut powder, vegetable oil and coconut milk. Mix until a consistent and smooth mixture is obtained.
4.     In another mixing bowl, using medium speed, whip egg whites and cream of tartar in B (using whisk attachment of mixer) until foamy. Add sugar in B and whip at high speed until soft peaks form. Reduce speed of mixer to medium and continue to whip until stiff peaks form.
5.     Fold 1/3 of whipped egg whites into mixture of Step 3. Then, pour this mixture to the remaining egg whites in the other mixing bowl. Fold lightly to combine both mixtures.
6.     Pour batter into a 8 inch round tube pan. Bake at a preheated over at 170 deg C for 40 minutes (I baked for 43 minutes) or until skewer inserted into center of cake comes out clean.
7.     As soon as the cake is removed from oven, quickly invert the pan and let it cool completely.
8.     When the cake is completely cool, run a knife around the sides of the tube pan to remove the cake. Take the cake out of the pan together with the tube portion. Run knife at the bottom of cake to remove cake from the tube portion of the pan.
The tall cake when just cool and inverted. The picture was taken with my phone so it looked pretty weird.
Note: I recommend using a hand mixer to whip egg whites, because with a stand mixer, it’s very easy to overbeat and the egg whites will become dry. I have a Philips stand mixer but I take the motor part out of the “stand”/base and hold it in my hand to beat egg whites. It’s faster too.

Tuesday, June 7, 2011

Ham and cheese bun rolls

I had always skipped bread and bun recipes, because the required time for the dough to rest and rise seemed to scare me. With two little kids, I can never make sure that I would have time to shape and/or bake the breads/buns at the exact time the dough doubles in size. And if I cannot shape and/or bake the breads/buns at the exact time, the dough will be spoilt, won’t it?

But this recipe required only 30 minutes for the dough to rest. I had read it many times to make sure it was ONLY 30 minutes, nothing more. And since it was my first time [making buns], I had a bunch of questions. Thanks to very kind Peng @ Peng’s Kitchen, I got my answers. I think I would have never made these lovely buns without her help/advice. Many thanks to Peng.

The buns turned out fabulous. They tasted really great, although the dough-resting time was only half an hour. I made a couple of cheese-only bun rolls for my elder son because he did not like ham. He ate one right away and another for the next day’s breakfast. He said it still tasted really good the next day (we got it microwaved). For the bun rolls with ham, I think they should not go into microwave because the processed meat does not like being microwaved. It [the processed meat] will produce some kind of very unhealthy chemicals, so the ham bun rolls should go to the [convectional] oven if you want to re-heat them.
Just out from the oven. My tray was small so the buns sticked together.
Recipe – adapted from Peng’s Kitchen:
Ingredient (8 buns)
  • 300gm bread flour
  • 10g instant yeast
  • 5g baking powder
  • 70g caster sugar
  • 20g butter, soften
  • 120ml water
  • 8pcs ham
  • 8 cheese slices
  • 1 small egg, lightly beaten
Method
1.     Place flour, yeast, baking powder, sugar & butter into a mixing bowl. Mix lightly with hands till butter is combined with the flour mixture.
2.     Pour in water gradually and mixing at the same time with hands. When all the water was poured in, take the dough out to a slightly floured surface, or a silicone mat, then knead till smooth for about 10mins (I kneaded for 15 minutes).
3.     Divide dough into 60g each. This should depend on the size of the ham pieces. My pieces are quite large, a bit bigger than a sandwich cheese slice. On a lightly floured surface, roll out dough into a rectangular shape, a bit larger than the size of your ham pieces. Place ham over the dough and a cheese slice over the ham, and roll up like a swiss roll. Using a dough scrapper, makes criss-cross patterns on the surface. Leave to rest for 30mins.
4.     Brush the rolls with beaten egg. Bake in preheated oven at 160 deg cel for 25-30mins until golden brown.
Note: For the bun rolls without ham, I used 2 cheese slices.

I took the photos the next day without re-heating the buns so they looked a bit dry and we can't clearly see the cheese. But they were still soft and delicious.

Friday, June 3, 2011

Mango yogurt chiffon cake – worry doesn’t help


A chiffon cake. Mango. Yogurt. All are my favorite. That was why I wanted to bake this mango yogurt chiffon right when I read the recipe in HoneyBeeSweets’ blog. It sounded like a great cake, not only delicious, but healthy too. What worried me was that HoneyBeeSweets wrote many of her mango cubes sank, which made a part of her cake collapsed. Many a time my chiffon cakes shrink too – though I have never experienced cake collapsion… yet – so I really wondered how my cake would turn out.

One big mango was used for this cake. One cheek was chopped into small cubes. The other was blended to get mango puree. The rest of the mango? Of course I ate it all :).

I followed the steps in the recipes, stirring in mango cubes to the egg yolk mixture before adding the flour mixture. I baked the cake at 170oC for 30 minutes, then lowered the temperature to 160oC and baked for another 20 minutes.

The outcome made me think that I had wasted my time worrying. I’d been worried for a few hours and now, here came one of the most delicious cakes I’d ever tasted. The worrying didn’t help. It just made me unable to focus that actually I almost overbeat the egg whites.

The cake stood tall and had a light sweet mango aroma. It was moist, and it still was within two days (I don’t know how long it could be kept because it was eaten up within two days). In fact, I could eat several slices at once as it tasted so fruity but I had to restrain myself because it wouldn’t be healthy to eat that much. This mango yogurt chiffon cake makes a good breakfast (together with some milk or some more yogurt) since it was light, soft and had both yogurt and fruit. The recipe is truly a keeper. Thanks HoneyBeeSweets for sharing.